Monday, January 9, 2012
Woodworking in Action!
So, how do you know when you've give an incomplete lesson? One of the kindergarteners notices and is upset. After using the sanding block, C.H. came up to me and said, "I did the work. Now how can I clean up the sawdust?" Why didn't I think of that?!? After a brief brainstorming session, he and I concluded that one slightly moist paper towel would do the trick. He didn't think it was wise to use the table crumber (yuck!).
Sunday, January 8, 2012
Woodworking in the Montessori Classroom
I am very excited to announce that my school received a very special handmade treasure not long ago. It was created by a current student and his dad over the past few months. The picture hardly does it justice:
This woodworking bench and some real tools will provide the children with years of satisfying work. A few traditional teachers and parents may be thinking..."Wait, you're going to allow twenty 3-6 year-olds to use REAL tools?!" My answer is "Why not?" Work such as this can be used in a primary classroom if a) the tools are the right size b) the tools function properly and c) the child is given a proper lesson. The use of real tools instills a sense of responsibility in the child. He is proud to know that his teacher trusts him, which in turn forms a respectful relationship.
My training introduces the following woodworking lessons:
- Nuts and Bolts
- Using a Wrench
- Sanding
- Hammering
- Using a Screwdriver
- Hex Bolts
- Sawing
There's no reason why I have to stop with the list above, just because it's what my training states. One of my former Montessori professors told us to take Montessori's philosophy and run with it in order to provide what the child needs. That's why she included so many extensions to the original Montessori lessons.
I'm looking forward to using this bench to someday create a birdfeeder, a birdhouse and maybe even a bat house!
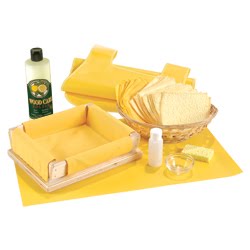
I recently ordered a child-sized vise and a manual drill from Montessori Services. If you'd like to try some woodworking activities or introductory activities at home, here are some materials you may need on hand.
Materials:
- child-sized safety goggles
- vise
- apron
- hammer
- screwdrivers
- screws/nails
- sanding block
- saw
- wood glue
- level
- measuring tape
1) Set up a tree stump in your backyard. Provide a small hammer, some nails (finishing nails seem to work best) and safety goggles. Show your child how to properly hammer the nails in, and then remove them to start over. Keep all materials in a toolbox or bin.
2) Clamp a piece of wood to a table or bench. As a fine motor exercise, use a carpenter's pencil to write on the piece of wood. Use a sanding block to sand away the pencil marks. Wouldn't you rather practice using a pencil at a woodbench, instead of with writing drills?
Have fun and trust your child to be a responsible carpenter!
Sunday, August 22, 2010
An Independent Breakfast
Here's what to order:
- Set up your bowls and the cereal dispenser on a low pantry shelf. Place the juice glasses on a serving tray on the same shelf.
- Fill one pitcher with milk and one with orange juice and place on a low shelf in the refrigerator.
Tell your child you are going to pour yourself a glass of juice. He or she is welcome to try it too as soon as you're finished presenting. Using limited words, show your child how to choose a juice glass and place it on the kitchen table. Walk to the refrigerator and choose the juice pitcher. Carry it properly with two hands- one on the handle and one supporting the spout. Slowly and deliberately, pour the juice into the glass. Put the pitcher back into the refrigerator, holding it properly. Then, sit down and enjoy your glass of juice. Stand up, push in your chair, and place in the dishwasher. (Maybe on the weekends, you can show your child how to wash the dish in the sink.)
Day Two:
Tell your child you are going to pour a bowl of cereal. He or she is welcome to eat the cereal as soon as you have prepared it. Using limited vocabulary (it's simply too distracting for the child to watch AND listen to you at the same time) show your child how to fetch a spoon and a napkin. Set your place (introduce place setting with this puzzle if you like). Walk to the pantry and choose a bowl. Put your bowl under the dispenser and turn the knob. Put your bowl on the table and clean up any pieces that may have fallen. Walk to the refrigerator and choose the milk pitcher. Carry it to the table properly and pour the desired amount of milk onto the cereal. Return the pitcher and invite your child to eat the bowl of cereal. Again, encourage pushing in the chair and placing items in the dishwasher.
Day Three:
Ask your child to pour himself a glass of juice. Then, ask him to serve himself a bowl of cereal. Watch carefully and note any difficulties. Go back later when your child is not present and find solutions to the problems.
Breaking the lesson into days ensures that your child has mastered one skill at a time, without getting overwhelmed. It may seem like extra work, but before you know it, your children will be downstairs serving themselves breakfast while you're catching a few extra zzzs!
Friday, July 30, 2010
Practical Life "Beef Up"
I spent the last few years slowly adding to the Math and Language areas of the classroom, to be sure I had a logical sequence to these activities. Now it is finally time for me to work on Practical Life. I'll soon be placing an order with Montessori Services, my favorite online spot for Practical Life goodies. I'm filling in some of my curriculum gaps with the following activities:
I'm very fortunate to have a friend of a friend who is making my cloth washing and dish washing stands. Otherwise, the price for these materials just get way out of hand.
I have already incorporated silver and shoe polishing into the curriculum, and they are certainly class favorites. I'm excited to show wood polishing to some of my returning students. They will truly enjoy transforming a dull wooden figure into a piece of art with a brilliant sheen. My youngest daughter will most definitely have some well-polished wooden animals in her Noah's Ark!
If you wish to incorporate wood polishing into your home activities, here's what you need (remember, try to color coordinate whenever possible):
- a basket or tray with high sides
- an apron
- non-toxic wood polish
- a sponge
- a small glass bowl
- a waterproof mat
- wood polishing cloths (you can order just the cloths here)
- cotton swabs
- wooden object in need of a good polish
Tuesday, May 18, 2010
Polishing Product
Sunday, April 18, 2010
Food Preparation
Movement: The child must be able to use his gross motor skills to carry the heavy tray to the table. Fine motor skills are used to pour the juice into small cups. The hand muscles are used to twist the lid off of the juicer in order to wash it.
Care of the Person: The child must learn to wash her hands before starting the activity, handwashing is one of the core practical life lessons. The proper use of a napkin is also essential for this work.
Care of the Environment: After the orange squeezing work, the child must be able to wash all of the dishes used. He also must have mastered the use of a broom and/or mop. There is a chance that the child may even need to scrub the table afterwards.
Grace & Courtesy: One of my favorite aspects of the Montessori curriculum, Grace & Courtesy teaches children how to work peacefully and politely in the classroom and larger community. In the orange squeezing example, the child learns to serve others before himself, he learns not to speak with food or drink in his mouth, and the other children learn how to accept or decline the offer for juice.
Now that our chick friends have left, I'm able to put food prep work back out on the shelves. Unfortunately, chicks are very dirty animals and I didn't want to take the chance that some of the younger students might forget to wash their hands. I put out egg slicing on Friday and, as always, it was a huge success. The children took great care with walking the egg from the refrigerator to the table. I heard "yes please" and "no thank you" from the children who were offered an egg slice. The only downfall...our classroom has a bit of an egg smell right now!!
Sunday, August 2, 2009
Opening and Closing
- Different types of bottles with twist or snap on lids
- Different types of boxes made from an assortment of materials
- Try an assortment of nuts and bolts for opening and closing
In order to avoid boredom and misuse of the materials, switch up the containers once every three weeks or so. Always follow these steps when presenting work at home:
- Observe the child
- Prepare activity when child is not present
- Practice using/presenting the material to be sure you haven't missed anything
- Place the activity neatly on a low shelf
- Invite the child to see the new activity
- Present the lesson using words only when absolutely necessary (children cannot listen to you and watch your hands at the same time)
- Clean up the activity without putting it away
- Invite the child to try
- Show the child how to place the work back on the shelf
- Observe the child using the material and jot down notes
- Make any necessary changes to the material when the child is not present
- Observe again!
Hopefully, if the work is developmentally appropriate and you've presented it in a way that intrigues him, he'll choose the lesson at another time and repeat it until mastered. You can see a common theme here: observe, observe, observe! These are the steps that Montessori teachers use each time a material is presented. Typically, teachers recommend for parents to only put out practical life and sensorial materials at home, so as not to interfere with the order of the academic lessons.
Wednesday, July 15, 2009
Coin Cleaning
This is what you need: placemat, paper towels, bowl, dirty pennies, old toothbrush, vinegar & salt (or warm water and soap for younger ones)
Preface this activity with an explanation about how coins are very dirty because they are constantly passed from person to person. The copper (the outside of the penny) becomes tarnished (the dull, greenish color is formed from copper oxide). The acid from the vinegar dissolves the copper oxide and leaves behind shiny pennies. We had fun dunking the penny halfway into the solution. Experiment with your little scientist! Try lemon juice too- it smells better!
Tuesday, June 30, 2009
Flea Market Treasures
This miniature bamboo book stand will fit perfectly in the Cultural area of the classroom. It will showcase Aline Wolf's Cosmic Wonder books beautifully. My kids (when I refer to "my kids" it will typically mean the children in my class. My actual kids will be referred to as "G"-the big girl and "g"- the little girl) adore these little books and sometimes choose one to copy and take home. When I say copy, I literally mean they sit down with a blank booklet and hand write the entire book, along with illustrations. Poor kids, little do they know they can go online and buy one copy for about $6!
...as if I don't have enough miniature baskets in my storage area. I just couldn't resist.
It's hard to see in the picture, but this is a bag of small wooden apples and a bag of sea glass. Perfect for Practical Life activities in September (apples) and June (sea glass).
This pint-size pitcher and bowl will make good use in the classroom for fingertip sensitizing before using the sandpaper letters or touch boards.
All of this for a whopping $2.50!!